Simplify meal planning & grocery shopping by compiling sets of recipes and their ingredients in advance! This is step 7 of 7 in the 2-Week Meal Planning series.

I keep my plans in the back of our binder-cookbook. Every night, I decide what I want for breakfast the next day from the choices in the current 2-Week Meal Plan. I love the flexibility; knowing my house is stocked with everything I need for so many recipes, we’re never bored by our options!
...and you?
How do you plan and prepare meals? Having typed it out, my system seems long and complicated, but honestly it’s just a few minutes here and there. What do you think about it?
Comment for a chance to win March's giveaway: gorgeous earrings from Pixe's Treasure Chest!
Simplify meal planning & grocery shopping by compiling sets of recipes and their ingredients in advance! This is step 6 of 7 in the 2-Week Meal Planning series.
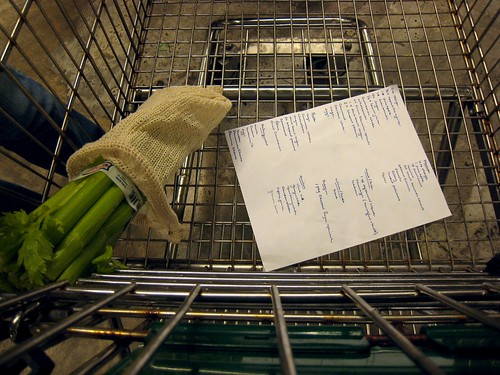 shopping list by Bruce Turner on Flickr
This part you will do more often, but still less than if you were cooking without plans!
All you do is take the step 5 list (which, if you continue with this system, you may have written years beforeheand!) and walk into your kitchen. Obviously, if you have enough, do nothing; if you don’t have any (or enough), write down what you need. I like to add fresh fruit and yogurt to all my lists as a reminder to get enough to healthily snack throughout the day. I also add household supplies as needed.
When you go shopping, buy anything that will last for the next entire two weeks.
For fruits and other perishables (which are most healthy when most fresh, anyway), pick these up as needed as often as you can - twice a week if possible for optimum nutrition, but at least once a week so they won’t go bad.
...and you?
Stephanie asked about meal planning shopping on the Sort Recipes post, and I shared some of my thoughts there. Ask your questions about what I've written so far in the comments!
Comment for a chance to win March's giveaway: gorgeous earrings from Pixe's Treasure Chest!
Simplify meal planning & grocery shopping by compiling sets of recipes and their ingredients in advance! This is step 5 of 7 in the 2-Week Meal Planning series.
Step #5: List all ingredients
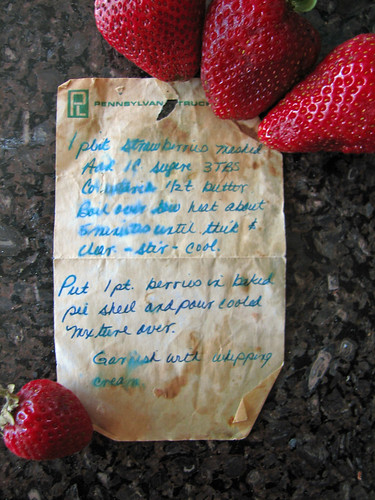
One point of all this planning is to simplify shopping! Grab a piece of scrap paper and, starting with the first recipe, begin listing the ingredients and amounts. It should look something like this:
flour: 1 cup
oats: 1 cup
bananas: 2
sugar: 1/4 cup
raisins: 1/4 cup
...and so on.
Now, take your second recipe. Where the ingredients overlap, add them together. Where they don’t, start a new line:
flour: 1 cup
oats: 1 cup + 1 cup
bananas: 2
sugar: 1/4 cup
raisins: 1/4 cup + 1/8 cup
apples: 1
Continue with the rest of the recipes. Don’t worry, you won’t do this every other week, just when you start your meal planning.
If you notice an ingredient ‘straggler’ (maybe a few Tbsp of something fresh that’s only sold in larger quantitates), you may switch out a different recipe at this point.
Writing one or two 2-Week Plans for each season means we never get tired of recipes, plus they’re geared to seasonal produce (like fruit) and weather (oatmeal in the winter, granola in the summer).
Once you’ve finished all the recipes, add the lines to find the total for each ingredient. Save this list for step 6, “Go Shopping”.
...and you?
What favorite ingredients are on your list? I'm loving the thought of all the grains and fruits on mine! You can share a photo at our flickr group!
Comment for a chance to win March's giveaway: gorgeous earrings from Pixe's Treasure Chest!
Simplify meal planning & grocery shopping by compiling sets of recipes and their ingredients in advance! This is step 4 of 7 in the 2-Week Meal Planning series.

Step #4: Sort recipes
Steps 1, 2, & 3 helped you decide on which recipes to use in your 2-Week Meal Plan. What now?
Simply:
* Print out recipes from the computer
* Pull other recipes out of your family cookbook (i.e. 3-ring binder)
* Bookmark recipes in your cookbooks
That’s it.
...and you?
So go spend the time you’d usually spend reading a longer post by doing it yourself! If you haven’t already, find recipes, select recipes, choose recipes, and then follow this easy step to sort recipes.
Stay tuned for the next step where you’ll list ALL the ingredients.
Comment for a chance to win March's giveaway: gorgeous earrings from Pixe's Treasure Chest!
Simplify meal planning & grocery shopping by compiling sets of recipes and their ingredients in advance! This is step 3 of 7 in the 2-Week Meal Planning series.
 Inside Cover from nate steiner on Flickr
Step #3: Choose recipes
If you completed Step #2, you have a lot of recipes to consider. Now it's time to narrow them down.
It’s hard to choose, so I eliminate instead. Out are recipes that:
* call for out-of-season produce
* call for a small amount of a random ingredient that none of the other recipes call for
I also look at the selection of recipes as a whole. I’m okay with one, but won’t cook two, recipes that are:
* sugary
* mostly white flour (unless I can substitute a whole grain)
I do try to prepare balanced and high-energy breakfasts, which to me means there is something with:
* (preferably whole) grain
* calcium
* fruit
* protein
I also like to try at least one new recipe a week, so two per 2-Week Meal Plan.
I should end up with enough recipes for 20 servings (10 meals for my husband and me; we eat out twice a week), which could be anywhere from 3-10 recipes (but usually 4 or 5... we like leftovers).
...and you?
If you found (or could type) any of the recipes you've chosen, comment here! It'll be fun to see what everyone's cooking.
Comment for a chance to win March's giveaway: gorgeous earrings from Pixe's Treasure Chest!
Simplify meal planning & grocery shopping by compiling sets of recipes and their ingredients in advance! This is step 2 of 7 in the 2-Week Meal Planning series.

Step #2: Select recipes
Avoid the 6am "now what am I going to make for breakfast!?" Plan ahead!
Equipped with your cookbooks you gathered in Step 1: Find Recipes, you're ready to select potentials for your meal plan.
Follow along and write selected recipe names on piece of scrap paper. These aren't necessarily final, so choose as many as you'd like.
note: As an example throughout this 2-Week Meal Planning series, I'll plan 2 weeks of healthy breakfasts.
Family Cookbook
I start by scanning recipe titles in relevant sections from my family cookbook. It’s a three-ring binder, so I can pull out recipes or just note the names.
Flipping past the breakfast tab, I find pancakes, oatmeals, and other warm dishes. They worked great during the winter, but I'm ready for something different.
I pull the whole wheat carrot cake muffins and zucchini-carrot muffins from the next tab, and grab the banana bread from the bread section.
Real Cookbooks
I know them well, so I don't actually look through them, but I write down "beignets," an Artisan Bread in Five recipe which will probably be our non-healthy, sweet treat for the two weeks (I generally allow one per plan).
Delicious Cookbook
I go to my Delicious Cookbook’s breakfast section and click on the “healthy” tag to only see those bookmarks. I open recipes that sound promising in new tabs. Though at this stage I’m mostly browsing, I do avoid those tagged with fruits that are now out of season. Fresh ingredient overlap is also nice, and I try to maintain a little variety.
We eat out two breakfasts a week (strange, I know, since we don’t eat any other meals out, but South Chinese rice noodles on market days are too good to miss!), so I’m looking for at least 10 recipes.
...and you?
Keep your list of recipes you might like to try for Step #3 - Choose Recipes. Keep the healthy breakfast ideas coming... I'm loving all the ideas so far.
Simplify meal planning & grocery shopping by compiling sets of recipes and their ingredients in advance! This is step 1 in the 2-Week Meal Planning series.

Step #1: Find recipes
Good recipes aren't hard to find... as long as you start looking before it's time to start cooking!
I have three "cookbooks" I go to:
1) our family cookbook
2) our five published cookbooks
3) my delicious cookbook
In step 2 I'll tell you how I decide which recipes to even consider, but for now, I want to share where my recipes come from.
Family Cookbook
Handwritten recipes and those I print that we like are filed in a three-ring binder under handmade tabs:
breakfast * muffins * bread * drinks * soup & slow cooker * stir-fry * poultry * meat * other main * veggies & sides * sweets
Your categories may be different based on what you cook more and less, but organizing your recipes in a similar style should help you find them easily.
Real Cookbooks
You can read more about our five cookbooks in a previous post. Obviously, you'll just want to pull out whatever cookbooks you have.
Delicious Cookbook
I tag links to all the recipes I find online in delicious. Make sure your tags are useful! I tag by:
* meal: breakfast, lunch, dinner
* part: side, main, drink
* type: muffin, pancake, granola
* nutrition: grain, veggie, dairy
* ingredient: banana, carrot, butter
* trait: sweet, healthy, quick
...and you?
I need a little help. Can you share a healthy breakfast recipe? Link to or write it in the comments! You can also tag it "for:simplyla" on delicious, which will make sure it gets into my delicious cookbook.
Comment for a chance to win February's giveaway: an adorable panda pillow from My Dear Darling!
Simplify meal planning & grocery shopping by compiling sets of recipes and their ingredients in advance! Follow this series to learn how.
With spring and warmer days coming, I’m scouring my delicious bookmarks for more weather-appropriate breakfast recipes. Though I haven’t yet figured out “OAMC” (once a month cooking), I do like to plan 2 weeks at a time to simplify grocery shopping.
For the rest of February, I’ll post on the steps I go through in my 2-Week Meal Planning. Here’s an outline; if you bookmark this page, you can come back to it and I’ll link the text in each step to its how-to post.
1. Find recipes
2. Select recipes
3. Choose recipes
4. Sort recipes
5. List ingredients
6. Go shopping
7. Repeat & enjoy
...and you?
* Bookmark this post and/or subscribe to SimpleMakes to stay updated with the series. I'll link each step in the list above once its post is live!
* Help me find a recipe! I'm looking for healthy recipes for breakfast that are simple to prepare. Have a good candidate? Write or link in the comments, tag for:simplyla on delicious, or email me here. Thanks!
Comment for a chance to win February's giveaway: an adorable panda pillow from My Dear Darling!
Enjoy Valentine's Day with your tastebuds and your crafty hands! Here are some treats & meal ideas from the kitchen, plus craft ideas to share.
 String of hearts by aussiegall on Flickr
Snacks: Sweet Snack Mix from scrumdilly-do
Drink: Healthy Strawberry-Banana Smoothie from SimpleMakes (er, me!)
Dinner: Candlelight on a Budget from MyRecipes
Dessert: Valentine's Day Treat Hit List from TipNut
Handmade Valentine: Little Acorn Valentine from Little Acorn
Crafty Gift: Valentine's Treasures from Schlosser Designs
Decor: Origami Cherry Blossoms from The Flirty Guide
Comment for a chance to win February's giveaway: an adorable panda pillow from My Dear Darling!
Whether you're out, it's not available, or it's not healthy, sometimes what you need for a recipe is... something else! Read on for ingredient substitutions.
I've used over 10 websites to find ingredient substitutions, but I think these two are the best:
What do I Substitute for... from Barry Farm Foods
The Cook's Thesaurus from FoodSubs
While looking for substitutions over the last few months, I've found that they're not all about replacing forgotten or unavailable ingredients. Substituting applesauce or mushed bananas for part of the fat in a recipe is one my favorite healthy substitions. Find even more at these sites:
Light Substitutions from AllRecipes
Healthy Substitutions from MayoClinic
...and you?
What are your favorite ingredient substitutions? Do you do 'em to be frugal, healthy, or something else?
Comment to enter January's giveaway: Layla Legs!
Don't forget to check out Mary's Jewelry shop on Etsy and use the 10% discount code for this month.
A recipe to make your own 'instant oatmeal' packets.
This recipe makes 10 servings of oatmeal. I usually make 2 plain, 2 apple, 3 raisin, and 3 brown sugar. Let me know if you've made other variations -- I'd love to try 'em out!
Basic mix:
3 1/3 cup (800 ml) old-fashioned rolled oats, pulsed in a food processor 4 times
2 tsp (10 ml) cinnamon
1-2 tsp (5-10 ml) salt, or to taste
After mixing the ingredients above in a large bowl, remove the amount you want to use for bowls of plain oatmeal and of apple oatmeal. One serving is 1/3 cup (80 ml). I place mine in individual-serve plastic baggies which I reuse for this purpose every week.
The plain oatmeal baggies are done. For the apple oatmeal baggies, spoon 1/3 cup (80 ml) of the oat mixture plus 1 Tbsp (15 ml) sugar and ~3 Tbsp (~40 ml) dried apples into each.
The remaining bowl will be divided into brown sugar and raisin oatmeal packets. Multiply the number of brown sugar and raisin oatmeal packets you want by 15ml (1 Tbsp). Mix this much brown sugar into the main bowl. Spoon 1/3 cup (80 ml) into each brown sugar baggie.
The remaining mix in the bowl is for your raisin oatmeal packets. Add ~3 Tbsp (~40 ml) raisins per raisin packet you want to make. Divide the mix evenly between the raisin oatmeal baggies, beginning with 1/3 cup (80 ml) per bag and using a spoon to roughly distribute leftovers.
Your packets are ready!
To use:
1. I've never measured how much liquid I add, and I everyone I know uses a different amount. What I do is pour one or two packets into a bowl. I then pour milk (I like a creamier oatmeal; my husband uses water) into the bowl until the oats are covered.
2. Microwave for 2 minutes, check and stir. Depending on how thin or thick you like your oatmeal, you can continue to microwave for additional 30 seconds until you like the consistency. I prefer to add more liquid in the first step and microwave longer in this step because it makes the oats very soft. For crisper oats, you can add less liquid in step 1 and microwave just 2 minutes in step 2. I think this option makes crusty goo. My husband likes it.
After a time or two of making these for breakfast, you'll figure out how much liquid you like and how long you should microwave it for your preferred consistency. Enjoy your quick, warm breakfast!!
...and you?
Variations? Questions? Preferences? Suggestions? What are your instant-oatmeal ideas? I'd also love to see other quick breakfast ideas, questions about how this idea works, and anything else.
Don't forget to comment to enter January's giveaway: Layla Legs!
I found this forum thread on WiseBread.com forums several months ago and have followed it ever since. Go check it out and join the discussion: do people live simply because they enjoy the simple life, or because they 'can't any do better'?

...and you?
I'd love to see a lively debate in the comments section right here, as well, so comment away!
Remember last winter's cold, drafty nights? What about the electricity bills as you tried to force out the low temperatures? Getting rid of air leaks is a first step to raise the inside temp while lowering energy use!

Locating and sealing your home's air leaks is green, because you're using less energy. It's also frugal, because less energy means lower energy bills. Thankfully, it's simple, too, because the air that makes your house cool is air that's easy to identify!
I was glad this week to find the link (in a 5 minutes for going green article) to a DIY guide for conducting a home energy audit. Because I live in an apartment and don't have a heater, not all the tips are relevant to me (though check it out if you own a home and can add insulation or replace outdated heating systems).
What I can do, though, is seal up air leaks. Here's how.
What to Do
1) Find air leaks
2) Caulk & seal air leak sources
To find air leaks, the how-to guide suggests a pressurization test, which you can read about in the article. Basically, you close off everything (door, windows, etc.) and then feel for spots where air is still moving (a wet hand will feel cold). Make sure to read the directions first for a few tips and warnings.
The guide then explains which types of cracks should be caulked and which should be sealed. Because it is dangerous for combustion appliances to not have enough air, you need to read the details in the article to make sure you're not sealing necessary vents.
Anything else?
As an added bonus, If you're like me and battle insects inside (which take advantage of some of those leaks, like windowsill cracks) during other seasons of the year, you'll take care of that problem at the same time, too!
...and you?
Share your links or tips for other ways to reduce energy use during the cold months. I'll meet you in the comments section!
Want to lessen your impact on the environment (and, likely, your utility bills), but not sure where to begin? Try these tips to start living more sustainably - today.

How can you start living more sustainably - today? I’ve brainstormed and listed my top 5 simple ideas... and I’m not the only one! If you want to make some simple changes today that make an impact on tomorrow, read on:
My Top Five
1. Be more active! Playing badminton, going for walks, and other outdoor activities require energy from you, not your powerlines! Replace TV and video game time with a walk after dinner tonight.
2. Unplug phantom energy sources - Many appliances, including computers and television sets, use electricity even if you aren't using them. Unplug them to ensure you aren’t using unnecessary power.
3. Use both sides of paper - A no-brainer? When writing on a full page of paper, I only like to use one side, so I used to throw it away half-unused. Now, however, I’ve found I can maintain the neat appearance when initially using the page, and make use of the other side later.
4. Turn off water - You’ve been told since you were a kid, but it’s still a good reminder: don’t leave water running when you’re brushing your teeth or doing other things that don’t need the water that moment.
5. Hang a clothesline - Even if you’re not ready to go 100% dryer-free, you can start by hanging towels, linens, cleaning cloths, etc. Or find a clothes-rack and an empty space in your apartment - you can air-dry indoors, too (I do it every day)!
Other Top Lists As I worked on my list, I realized bloggers and sites all over were posting lists to help you start living sustainably! Here are the lists I liked best.
1. Blissfully Domestic
2. Lighter Footstep
3. Life Less Plastic
4. Tree Hugger
5. 50 Ways to Help
...and you?
What’s your sustainability top 5? What do you think of these lists? Criticisms accepted :-), as well as stories of newly-found sustainable lifestyles, which may be featured in later posts.
As always, relevant photos (with a link to this post in the photo description or as a comment) welcome at our flickr group... photos with Creative Commons licensing may be featured in future articles with a link to any of your websites you’d like to promote!
Note: Welcome visitors from SimpleMom.net, which just so happens to be my favorite blog to read myself! Check out this list of some top Simple Makes posts in several categories, and subscribe to the RSS feed so you can get upcoming posts like this on composting and green living, plus simple living in home, family, and crafting!
Interested in composting, but stuck with small quarters and no yard? These how-to guides walk you through each step which I myself use for my windowsill compost pile. Start composting now, and share your success!

Basic Steps in Composting
Click each link below to read that step’s how-to guide.
1. Make a container to hold your compost pile.
2. Layer your container with brown and green materials.
3. Maintain your compost pile weekly.
4. Use your compost.
5. Remind yourself of what to do with my downloadable Composting Guide.
Also see...
If you’re not convinced that you should be composting, check out livingsoil.co.uk
If you want to know all the science-y reasons why this works, see this article
...and you?
If you compost already, what do you think of these steps? What steps do you take in composting?
If you haven’t composted before (or lately), will you start now? Does it sound easy enough? If you’re not interested, what’s keeping you from doing it?
Comments and praise, doubts and criticism all accepted :-)
Your photos of compost piles, compost-happy plants, and composting families in action (with a link to this post in the photo description or as a comment) are all welcome at our flickr group... photos with Creative Commons licensing may be featured in future articles with a link to any of your websites you’d like to promote!
 As much as I'd love for you to visit Simple Makes daily, I can't really imagine you running with a handful of vegetable peels from the kitchen to the computer to make sure you're putting it in the right layer!
No worries. Enter my Composting Guide, a free printable how-to! I've compiled the important highlights from all the Start Apartment Composting articles into a one-page chart. Here you'll find reminders on what to do each week as well as lists of what's okay and what's a composting no-no. Print it out (in grayscale, for the color ink cartridge conscious) and tape it up near your pile. Simple!
And, since I've used the same Creative Commons license for the PDF that all www.SimpleMakes.com text is under, you can share it as much as you like, so long as you attribute it to "Lori Ann Gregory of www.SimpleMakes.com"!
Candle wax stuck to their glass holders? Here’s an easy fix - and a solution to prevent it from happening again!

1. Stick the glass in the freezer. Wait.
2. After an hour (or two, or three, if you want to be sure or if it doesn’t seem to budge at first), take the glass out.
3. Using something that’ll reach into the glass without scratching it up, like a dull butter knife or a spoon, push at the wax. It might take just a minute (not long, and not lots of scratching at it), but then should come off, leaving hardly anything.
4. Stick the glass in the sink to wash any remaining reside with soapy water.
5. Use the glass again... but read the "prevention" tips first!
Prevention
Next time, do one of two things first. Either put a little bit of water or a little bit of dishsoap in the bottom of the glass before the candles. It’ll keep the wax from sticking. Simple!
...and you?
Try it out, and let me know: did it work? It did for me - and I was using drinking glasses (hey, there was a power outage; I didn’t have time to go buy candlesticks)!!
What other simple household cleaning tips can you share? They may be featured in later posts!
Waxy glass photos welcome at our flickr group! Photos with Creative Commons licensing may be featured in future articles with a link to any of your websites you’d like to promote.
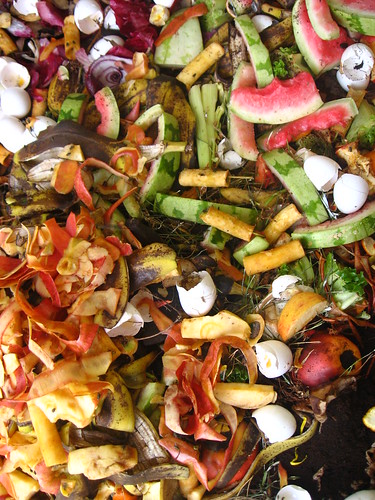
It’s a beautiful transformation when those old, fungus-ridden veggie peels and cotton dryer lint become a dark, nutritious, earthy compost. But... not beautiful enough to frame. The beauty is in compost’s function, and here, I’ll give you mini-recipes for the 3 simplest ways to use your compost. Enjoy!
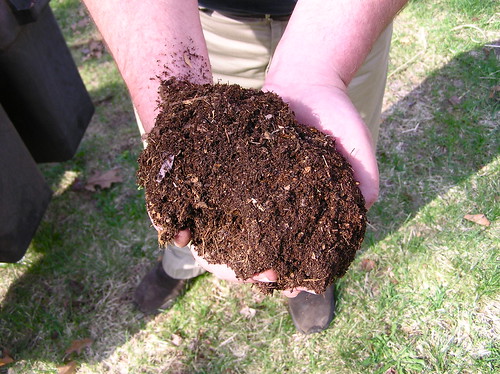 better compost by normanack on flickr
* dark brown or black in color
* soft
* crumbly
* mostly smooth (you can throw that stubborn corncob back in the pile)
* earthy-smelling
I’ve read estimates that you will have useable compost anywhere from “4-6 weeks” to “3 months” based on the size of your pile, but I don’t keep track; as long as you maintain the pile weekly, it should be clear when it’s ready.
Here are 3 mini-recipes to use your compost:
Plant Seeds
Make a potting mixture of 1 part compost to 3 parts soil and put in pots, about an inch short of the brim. Plant your seeds in these pots just as you would any other soil.
Plant Seedlings
Plants that already have roots can handle more compost, so your potting mixture for seedlings or transplanting plants can be 1 part compost to 2 parts soil.
Nourish Established Houseplants
If your potted plants (or flowers, herbs, vegetables) are already growing, use the compost with nothing added and sprinkle on the surface of the dirt. (If you don’t have room, you can shovel out a layer of the dirt that’s already in the pot and replace it with the compost).
What to plant?
I use all my compost for my herb gardens - we have pots in the living room, kitchen, bedroom, and the staircase landing outside our apartment. Stay tuned for an upcoming post!
More on Composting
This post is step 4 in my Start Apartment Composting series. Check it out to see all the steps, plus a free printable guide to hang near your compost pile.
...and you?
What recipes do you use your compost with? I’m especially interested in “compost tea” - I’ve never tried it but would if I had some simple instructions!
Still accepting photos (with a link to this post in the photo description or as a comment) at our flickr group... photos with Creative Commons licensing may be featured in future articles with a link to any of your websites you’d like to promote!
This is step 3 in our Start Apartment Composting series. If you’re new here, see the original composting post. For all you already composting (through this series or otherwise), “Maintaining your Compost Pile” gives you the know-how for what you do as time goes on with your compost pile. This is probably the easiest step, so don’t fear - just read on!
 compost by collinanderson on flickr
Weekly Maintenance
Either as you add materials or on a set day each week (say, the day you clean the kitchen, if it’s in the kitchen windowsill), you’ll want to see how things are going and nudge it along in its composting. Here’s what to do:
* Stir or “toss” the pile, perhaps with a small hand shovel, to work air into it.
* Water it if it seems dry.
* If your pile is cold (composting piles should feel warm when you put your hand over them, especially after stirring the pile), add more green material.
* If your pile stinks (it happens, but you can prevent it), add more brown material.
* If you notice worms or white fungus - do nothing! These guys are great composting assistants.
That’s it! Really! Just keep adding, keep maintaining, and when you realize that your pile (or a lot of it) has become dark, soft, and earthy-smelling, you’re ready for Step 4.
...and you?
How’s your compost pile doing? Are you finding composting (whether you’re using SimpleMakes how-to’s or you’ve been doing this for years) easier or more challenging than you expected? Are you glad you’re doing it?
Don’t forget to add your composting photos (with a link to this a post in this series in the photo description or comments) to our flickr group... and, as always, photos with Creative Commons licensing may be featured in future articles with a link to any of your websites you’d like to promote!
This is step 2 in our Start Apartment Composting series. If you’re just checking in, see the first post. For everyone else, this how-to provides the nitty-gritty details of what you actually DO to compost!

You have your compost pile container from Step 1. What now?
It’s all about the Green and the Brown. Green and Brown materials are the two categories of what you put into your container - these are the materials that will break down, leaving you with that wonderful compost!
Every day as you go about your life, cooking, cleaning, and otherwise living, you’ll run into these materials that you don’t need. They’ll either fit into the “brown” or the “green” materials category. Following the guidelines below, you’ll throw them in the container, and watch your scraps compost themselves! Here’s how.
First, here are the basic rules you’ll follow in composting:
* Shred material before adding in to the pile. I try to get thick materials to the size of my thumb and flat materials (paper) postage-stamp sized.
* Keep the pile moist by adding water when it seems dry.
* The bottom and top layers should be brown materials (to keep it from stinking).
* There should be an approximately 50/50% ratio of green to brown material.
* Let it breathe (don’t fill it up to the lid).
* Don’t put anything in it you don’t want in the end (i.e., don’t throw weeds that have seeds in there if you don’t want ‘em in your houseplants you’ll later add compost to)
Brown materials:
* dead leaves * pine needles * straw * sawdust (from untreated wood) * wood chips * dirt * newspaper * twigs * tree bark * cardboard & toilet paper rolls * hair * fur * dryer lint (assuming it’s not chemical-ridden) * cotton cloth (old rags, socks)
Green materials:
* grass * fruit scraps * veggie scraps * eggshells * coffee grounds * tea leaves * tea bags * nut shells * trimmings from most trees and plants
NO-NO’s:
(i.e. DON’T add these - some won’t compost, some attract rats, some negatively affect your finished product i.e. plants you add compost to)
* meat * bones * fat * oil * grease * black walnut leaves or twigs * chemicals like pesticides * dairy products * human or pet waste * flour * food sauces * ashes * charcoal * nonorganics (like plastic) * diseased or mildewed plants * weeds
It’s an art, not a science.
While that’s probably technically inaccurate, my point is that you’re making a composting pile to add to what you do in your home, not to suck the life out of it. Don’t stress. You’ll learn what you can tinker with and what you shouldn’t. You can’t get that corn cob any smaller? Shrug and throw it in there whole. It’ll compost eventually. No time to shred up some old toilet paper rolls after throwing in a bunch of fruit peels? Worry about it later. Has your pile been dried out for a week? Water it, and move on. Enjoy composting; don’t be enslaved to it.
...and you?
How does it sound? Manageable? Complicated? Don’t worry about keeping up with the brown/green/no lists - they’re all in my all-inclusive Composting Guide - you can print it and hang near your pile.
Comment with your thoughts on the feasibility of implementing a compost pile into your home life - questions are welcome, too!
Composting photos (with a link to this post in the photo description or as a comment) are welcome at our flickr group, and photos with Creative Commons licensing may be featured in future composting articles! I’ll thank you with a link to any website you have which you’d like to promote.