Simplify meal planning & grocery shopping by compiling sets of recipes and their ingredients in advance! This is step 7 of 7 in the 2-Week Meal Planning series.

I keep my plans in the back of our binder-cookbook. Every night, I decide what I want for breakfast the next day from the choices in the current 2-Week Meal Plan. I love the flexibility; knowing my house is stocked with everything I need for so many recipes, we’re never bored by our options!
...and you?
How do you plan and prepare meals? Having typed it out, my system seems long and complicated, but honestly it’s just a few minutes here and there. What do you think about it?
Comment for a chance to win March's giveaway: gorgeous earrings from Pixe's Treasure Chest!
Simplify meal planning & grocery shopping by compiling sets of recipes and their ingredients in advance! This is step 6 of 7 in the 2-Week Meal Planning series.
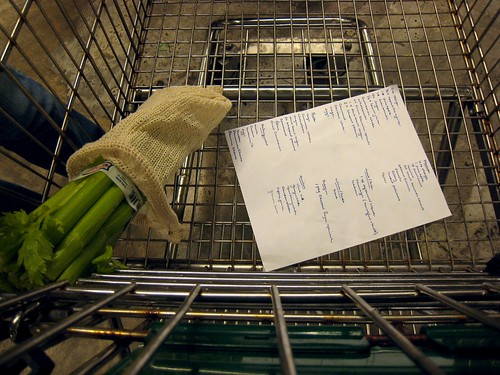 shopping list by Bruce Turner on Flickr
This part you will do more often, but still less than if you were cooking without plans!
All you do is take the step 5 list (which, if you continue with this system, you may have written years beforeheand!) and walk into your kitchen. Obviously, if you have enough, do nothing; if you don’t have any (or enough), write down what you need. I like to add fresh fruit and yogurt to all my lists as a reminder to get enough to healthily snack throughout the day. I also add household supplies as needed.
When you go shopping, buy anything that will last for the next entire two weeks.
For fruits and other perishables (which are most healthy when most fresh, anyway), pick these up as needed as often as you can - twice a week if possible for optimum nutrition, but at least once a week so they won’t go bad.
...and you?
Stephanie asked about meal planning shopping on the Sort Recipes post, and I shared some of my thoughts there. Ask your questions about what I've written so far in the comments!
Comment for a chance to win March's giveaway: gorgeous earrings from Pixe's Treasure Chest!
Simplify meal planning & grocery shopping by compiling sets of recipes and their ingredients in advance! This is step 5 of 7 in the 2-Week Meal Planning series.
Step #5: List all ingredients
One point of all this planning is to simplify shopping! Grab a piece of scrap paper and, starting with the first recipe, begin listing the ingredients and amounts. It should look something like this:
flour: 1 cup
oats: 1 cup
bananas: 2
sugar: 1/4 cup
raisins: 1/4 cup
...and so on.
Now, take your second recipe. Where the ingredients overlap, add them together. Where they don’t, start a new line:
flour: 1 cup
oats: 1 cup + 1 cup
bananas: 2
sugar: 1/4 cup
raisins: 1/4 cup + 1/8 cup
apples: 1
Continue with the rest of the recipes. Don’t worry, you won’t do this every other week, just when you start your meal planning.
If you notice an ingredient ‘straggler’ (maybe a few Tbsp of something fresh that’s only sold in larger quantitates), you may switch out a different recipe at this point.
Writing one or two 2-Week Plans for each season means we never get tired of recipes, plus they’re geared to seasonal produce (like fruit) and weather (oatmeal in the winter, granola in the summer).
Once you’ve finished all the recipes, add the lines to find the total for each ingredient. Save this list for step 6, “Go Shopping”.
...and you?
What favorite ingredients are on your list? I'm loving the thought of all the grains and fruits on mine! You can share a photo at our flickr group!
Comment for a chance to win March's giveaway: gorgeous earrings from Pixe's Treasure Chest!
Simplify meal planning & grocery shopping by compiling sets of recipes and their ingredients in advance! This is step 4 of 7 in the 2-Week Meal Planning series.

Step #4: Sort recipes
Steps 1, 2, & 3 helped you decide on which recipes to use in your 2-Week Meal Plan. What now?
Simply:
* Print out recipes from the computer
* Pull other recipes out of your family cookbook (i.e. 3-ring binder)
* Bookmark recipes in your cookbooks
That’s it.
...and you?
So go spend the time you’d usually spend reading a longer post by doing it yourself! If you haven’t already, find recipes, select recipes, choose recipes, and then follow this easy step to sort recipes.
Stay tuned for the next step where you’ll list ALL the ingredients.
Comment for a chance to win March's giveaway: gorgeous earrings from Pixe's Treasure Chest!
Simplify meal planning & grocery shopping by compiling sets of recipes and their ingredients in advance! This is step 3 of 7 in the 2-Week Meal Planning series.
 Inside Cover from nate steiner on Flickr
Step #3: Choose recipes
If you completed Step #2, you have a lot of recipes to consider. Now it's time to narrow them down.
It’s hard to choose, so I eliminate instead. Out are recipes that:
* call for out-of-season produce
* call for a small amount of a random ingredient that none of the other recipes call for
I also look at the selection of recipes as a whole. I’m okay with one, but won’t cook two, recipes that are:
* sugary
* mostly white flour (unless I can substitute a whole grain)
I do try to prepare balanced and high-energy breakfasts, which to me means there is something with:
* (preferably whole) grain
* calcium
* fruit
* protein
I also like to try at least one new recipe a week, so two per 2-Week Meal Plan.
I should end up with enough recipes for 20 servings (10 meals for my husband and me; we eat out twice a week), which could be anywhere from 3-10 recipes (but usually 4 or 5... we like leftovers).
...and you?
If you found (or could type) any of the recipes you've chosen, comment here! It'll be fun to see what everyone's cooking.
Comment for a chance to win March's giveaway: gorgeous earrings from Pixe's Treasure Chest!
Simplify meal planning & grocery shopping by compiling sets of recipes and their ingredients in advance! This is step 2 of 7 in the 2-Week Meal Planning series.

Step #2: Select recipes
Avoid the 6am "now what am I going to make for breakfast!?" Plan ahead!
Equipped with your cookbooks you gathered in Step 1: Find Recipes, you're ready to select potentials for your meal plan.
Follow along and write selected recipe names on piece of scrap paper. These aren't necessarily final, so choose as many as you'd like.
note: As an example throughout this 2-Week Meal Planning series, I'll plan 2 weeks of healthy breakfasts.
Family Cookbook
I start by scanning recipe titles in relevant sections from my family cookbook. It’s a three-ring binder, so I can pull out recipes or just note the names.
Flipping past the breakfast tab, I find pancakes, oatmeals, and other warm dishes. They worked great during the winter, but I'm ready for something different.
I pull the whole wheat carrot cake muffins and zucchini-carrot muffins from the next tab, and grab the banana bread from the bread section.
Real Cookbooks
I know them well, so I don't actually look through them, but I write down "beignets," an Artisan Bread in Five recipe which will probably be our non-healthy, sweet treat for the two weeks (I generally allow one per plan).
Delicious Cookbook
I go to my Delicious Cookbook’s breakfast section and click on the “healthy” tag to only see those bookmarks. I open recipes that sound promising in new tabs. Though at this stage I’m mostly browsing, I do avoid those tagged with fruits that are now out of season. Fresh ingredient overlap is also nice, and I try to maintain a little variety.
We eat out two breakfasts a week (strange, I know, since we don’t eat any other meals out, but South Chinese rice noodles on market days are too good to miss!), so I’m looking for at least 10 recipes.
...and you?
Keep your list of recipes you might like to try for Step #3 - Choose Recipes. Keep the healthy breakfast ideas coming... I'm loving all the ideas so far.
Simplify meal planning & grocery shopping by compiling sets of recipes and their ingredients in advance! This is step 1 in the 2-Week Meal Planning series.

Step #1: Find recipes
Good recipes aren't hard to find... as long as you start looking before it's time to start cooking!
I have three "cookbooks" I go to:
1) our family cookbook
2) our five published cookbooks
3) my delicious cookbook
In step 2 I'll tell you how I decide which recipes to even consider, but for now, I want to share where my recipes come from.
Family Cookbook
Handwritten recipes and those I print that we like are filed in a three-ring binder under handmade tabs:
breakfast * muffins * bread * drinks * soup & slow cooker * stir-fry * poultry * meat * other main * veggies & sides * sweets
Your categories may be different based on what you cook more and less, but organizing your recipes in a similar style should help you find them easily.
Real Cookbooks
You can read more about our five cookbooks in a previous post. Obviously, you'll just want to pull out whatever cookbooks you have.
Delicious Cookbook
I tag links to all the recipes I find online in delicious. Make sure your tags are useful! I tag by:
* meal: breakfast, lunch, dinner
* part: side, main, drink
* type: muffin, pancake, granola
* nutrition: grain, veggie, dairy
* ingredient: banana, carrot, butter
* trait: sweet, healthy, quick
...and you?
I need a little help. Can you share a healthy breakfast recipe? Link to or write it in the comments! You can also tag it "for:simplyla" on delicious, which will make sure it gets into my delicious cookbook.
Comment for a chance to win February's giveaway: an adorable panda pillow from My Dear Darling!
Simplify meal planning & grocery shopping by compiling sets of recipes and their ingredients in advance! Follow this series to learn how.
With spring and warmer days coming, I’m scouring my delicious bookmarks for more weather-appropriate breakfast recipes. Though I haven’t yet figured out “OAMC” (once a month cooking), I do like to plan 2 weeks at a time to simplify grocery shopping.
For the rest of February, I’ll post on the steps I go through in my 2-Week Meal Planning. Here’s an outline; if you bookmark this page, you can come back to it and I’ll link the text in each step to its how-to post.
1. Find recipes
2. Select recipes
3. Choose recipes
4. Sort recipes
5. List ingredients
6. Go shopping
7. Repeat & enjoy
...and you?
* Bookmark this post and/or subscribe to SimpleMakes to stay updated with the series. I'll link each step in the list above once its post is live!
* Help me find a recipe! I'm looking for healthy recipes for breakfast that are simple to prepare. Have a good candidate? Write or link in the comments, tag for:simplyla on delicious, or email me here. Thanks!
Comment for a chance to win February's giveaway: an adorable panda pillow from My Dear Darling!
Enjoy Valentine's Day with your tastebuds and your crafty hands! Here are some treats & meal ideas from the kitchen, plus craft ideas to share.
 String of hearts by aussiegall on Flickr
Snacks: Sweet Snack Mix from scrumdilly-do
Drink: Healthy Strawberry-Banana Smoothie from SimpleMakes (er, me!)
Dinner: Candlelight on a Budget from MyRecipes
Dessert: Valentine's Day Treat Hit List from TipNut
Handmade Valentine: Little Acorn Valentine from Little Acorn
Crafty Gift: Valentine's Treasures from Schlosser Designs
Decor: Origami Cherry Blossoms from The Flirty Guide
Comment for a chance to win February's giveaway: an adorable panda pillow from My Dear Darling!
A healthy & simple sweet treat, this smoothie has no added sugar and looks great for Valentine's Day with a sliced strawberry on top!
Strawberry-Banana Smoothie
ingredients:
6 large strawberries (or 18 small strawberries)
3 small bananas (about 2 medium bananas)
4/5 to 1 cup (200 ml) plain yogurt
2 cups (500 ml) ice*
1) Peel bananas, wash strawberries and remove stems.
2) Combine all ingredients in blender and blend until smooth.
3) Pour into two glasses and enjoy!
* ice tip: Freeze water in small ice cube trays just 3 or so hours until not entirely frozen; you'll still see some water in the middle of the cubes. This makes for easier-to-blend ice and a smoother smoothie!
...and you?
Surprise your sweetie (or kids, or friend, or whomever!) with this treat and let me know how it goes. Stay tuned for Thursday's post, a complete menu for Valentine's day including this smoothie and more!
Comment for a chance to win February's giveaway: an adorable panda pillow from My Dear Darling!
I've been making dozens of these wheat rolls every month lately (a batch a week). Healthy, easy, and yummy. Nice!

The Recipe
I use an adapted dough from Artisan Bread in Five. Their 100% Whole Wheat Sandwich Bread dough, adjusted for my high but humid home, makes a nice loaf or free-form bread. I found out after baking it a few times that it also works great to make these adorable, high-fiber rolls!
I don't want to steal their recipe by posting it here, but you can find it in the "Peasant Loaves" section of Artisan Bread in Five. To make rolls of your own, start with a whole wheat bread dough or use the main "Master Recipe" from Artisan Bread in Five, a white flour dough, maybe substituting whole wheat flour.
The Technique
Unlike some recipes, the Artisan Bread in Five technique doesn't require extra time for a knead - rest - rise cycle. Instead, it rises slowly in the refrigerator overnight. Regardless of what you use, flour your hands, the risen dough, and the table.
Since I like to eat these rolls for health reasons, I weigh out the dough so each roll is an equal 1 oz roll. That way, I know how much whole grain I'm getting. If it doesn't matter for you, just do this by sight.
First, cut the dough in half using a floured or oiled serrated knife. Then, do this again. Next, do it again. You get the point. Keep cutting in half until the rolls are around 1 oz. I use a pound of dough and end up with 16 rolls.
Now, shape each chunk of dough into a ball using the technique in step 3 at the Artisan Bread in Five Master Recipe.
At this point, you can leave the dough to rise for larger, fluffier rolls, or bake them right away for a more dense, chewy dough. I bake mine on 200C (that's about 400F; try 350F if you're not at a high altitude). Use this Artisan Bread in Five technique: preheat the oven with a baking stone and a broiler tray or other pan. When the oven's heated, place the rolls on the stone and pour a cup of water into the broiler tray. The steam creates moisture for a soft inside and crisp crust!
These usually take about 3/4ths as long as the recipe says, since you're baking small rolls, not one large loaf.
The Verdict?
These have come out wonderfully for me every time. They're quick to make and are also healthy, tasty, and versatile! (Try poking a hole in a roll with your finger and sticking a cheddar cheese cube in there. Microwave 5 minutes. Delicious!)
Cleanup is easy; with Artisan Bread in Five dough, all you have to wash is a bowl, a measuring cup, and a spoon. Rolling the dough on the table, I just use a plastic rice paddle (what comes with rice cookers) to scrape it off, maybe wiping it off with a bit of vinegar, and it's clean. And the baking stone doesn't need much washing; the bread should come off of it cleanly since it's so hot.
...and you?
I'd recommend getting a copy of the book I use (yes, I get a commission if you buy it through these links, but I honestly do think it's a good buy for simple families everywhere!), but if you don't have it, try the bread-dough-as-rolls technique on other favorite recipes, and comment here with how they turn out (and links to recipes, if you have 'em!)
Comment for a chance to win February's giveaway: an adorable panda pillow from My Dear Darling!
Whether you're out, it's not available, or it's not healthy, sometimes what you need for a recipe is... something else! Read on for ingredient substitutions.
I've used over 10 websites to find ingredient substitutions, but I think these two are the best:
What do I Substitute for... from Barry Farm Foods
The Cook's Thesaurus from FoodSubs
While looking for substitutions over the last few months, I've found that they're not all about replacing forgotten or unavailable ingredients. Substituting applesauce or mushed bananas for part of the fat in a recipe is one my favorite healthy substitions. Find even more at these sites:
Light Substitutions from AllRecipes
Healthy Substitutions from MayoClinic
...and you?
What are your favorite ingredient substitutions? Do you do 'em to be frugal, healthy, or something else?
Comment to enter January's giveaway: Layla Legs!
Don't forget to check out Mary's Jewelry shop on Etsy and use the 10% discount code for this month.
A recipe to make your own 'instant oatmeal' packets.
This recipe makes 10 servings of oatmeal. I usually make 2 plain, 2 apple, 3 raisin, and 3 brown sugar. Let me know if you've made other variations -- I'd love to try 'em out!
Basic mix:
3 1/3 cup (800 ml) old-fashioned rolled oats, pulsed in a food processor 4 times
2 tsp (10 ml) cinnamon
1-2 tsp (5-10 ml) salt, or to taste
After mixing the ingredients above in a large bowl, remove the amount you want to use for bowls of plain oatmeal and of apple oatmeal. One serving is 1/3 cup (80 ml). I place mine in individual-serve plastic baggies which I reuse for this purpose every week.
The plain oatmeal baggies are done. For the apple oatmeal baggies, spoon 1/3 cup (80 ml) of the oat mixture plus 1 Tbsp (15 ml) sugar and ~3 Tbsp (~40 ml) dried apples into each.
The remaining bowl will be divided into brown sugar and raisin oatmeal packets. Multiply the number of brown sugar and raisin oatmeal packets you want by 15ml (1 Tbsp). Mix this much brown sugar into the main bowl. Spoon 1/3 cup (80 ml) into each brown sugar baggie.
The remaining mix in the bowl is for your raisin oatmeal packets. Add ~3 Tbsp (~40 ml) raisins per raisin packet you want to make. Divide the mix evenly between the raisin oatmeal baggies, beginning with 1/3 cup (80 ml) per bag and using a spoon to roughly distribute leftovers.
Your packets are ready!
To use:
1. I've never measured how much liquid I add, and I everyone I know uses a different amount. What I do is pour one or two packets into a bowl. I then pour milk (I like a creamier oatmeal; my husband uses water) into the bowl until the oats are covered.
2. Microwave for 2 minutes, check and stir. Depending on how thin or thick you like your oatmeal, you can continue to microwave for additional 30 seconds until you like the consistency. I prefer to add more liquid in the first step and microwave longer in this step because it makes the oats very soft. For crisper oats, you can add less liquid in step 1 and microwave just 2 minutes in step 2. I think this option makes crusty goo. My husband likes it.
After a time or two of making these for breakfast, you'll figure out how much liquid you like and how long you should microwave it for your preferred consistency. Enjoy your quick, warm breakfast!!
...and you?
Variations? Questions? Preferences? Suggestions? What are your instant-oatmeal ideas? I'd also love to see other quick breakfast ideas, questions about how this idea works, and anything else.
Don't forget to comment to enter January's giveaway: Layla Legs!
Whether a recipe made too much or just took a lot of work, storing more for later is always a great way to simplify your baking routine. Use my "Bread for Later" guide to make sure it still tastes great!

Step 1: Make Bread (or buy it - try a bakery thrift store)
All these tasty, simple recipes produce breads that freeze well.
My favorite bread book, Artisan Bread in Five Minutes a Day, teaches a technique that allows you to make bread dough, in as large a batch as you'd like, and store the dough in the refrigerator to quickly make whenever you want fresh, warm bread.
Step 2: DON'T refrigerate it
Refrigerated bread goes stale more quickly. Really. Don't refrigerate it. The common myth that "refrigerated bread lasts longer" continues because refrigerated bread DOES mold slower, but if you follow these instructions, you won't have stale OR molded bread.
Don't believe me? Read here, here, here, and here.
note: if you have a custard or meat-filled bread, you can't leave it out at room temperature. freeze it (step 3 "for later") or refrigerate it for as short a time as possible.
Step 3: Separate "for now" from "for later"
Keep out however much bread you'll be able to eat in the next two to three days, or however long it will last before going stale or molding.
Freeze the "for later" bread. Wrap it in an airtight container (even a plastic ziptop freezer bag will work; we keep one bag for muffins and reuse it over and over). If it's a loaf, you might want to slice it first because it will be hard once frozen. If you'll remove the entire loaf, thaw, and gift, then it doesn't matter. You can keep bread frozen for three or more months.
Take a look at your "for now" bread. Does it have a crusty outside, or is it soft all over? Crusty breads should be stored in a paper bag, not an airtight container. Sometimes I just cover mine with a kitchen towel. Soft breads, like sandwich bread, are best kept in plastic, either the plastic bag it came in or a plastic container. I've been told that ceramic bread boxes are really the best solution for any type of bread, but I've never had one myself so I can't be sure. (Anyone have experiences to share?) If you just baked your bread, wait til it's room temperature before you store it in anything.
Step 4: Warm it
Thaw frozen bread at room temperature. This means you need to plan ahead. If you need a few slices immediately, you can eat them as toast. Use a toaster or oven for a few minutes, watching til it looks crisp.
Room temperature bread (whether stored "for now" bread or frozen "for later" bread that has thawed) can be warmed in the microwave as long as you add moisture to keep it from getting tough. Here are ways I reheat slices of bread:
* Place the bread on a wet paper towel. Microwave, checking every 30 seconds.
* Toast in the oven.
* Microwave in a bowl with butter on top of the bread, checking every 30 seconds.
* Microwave on a small plate, checking every 30 seconds. Put a glass of water in the microwave. The steam will keep the bread moist.
Step 5: Repurpose It
Try as you might, sometimes you'll miss and your bread will go stale.
Thankfully, Italian food, restaurants, and smart bloggers all use stale bread. Give their ideas a try!
...and you?
How do you store your bread? Any more ideas for repurposing stale bread? Share your ideas in the comments! Links to posts you've written are welcome!
I finally remembered the apples I've had hidden in the freezer... the bruised ones were on sale for the equivalent of 6¢ a pound last week, and while everyone else passed them by, I thought: "applesauce!" Here's my recipe.

Microwaved?
I've been making applesauce for months since we moved here (it's not in stores), but always end up with burnt gook on the bottom of the pot that I have to scrub out. One day I wondered, "can I make this in the microwave?," started clicking around online, and found several ideas. However, I like mine low- or no-sugar, so I've adjusted a combination of several recipes I found to result in this one.
The Ingredients
This is a per-apple recipe, so it's simple to multiply it times the number of apples you have:
* 1 medium apple
* 1 Tbsp water
* ½ tsp brown sugar (optional)
* ½ tsp butter
* ½ tsp cinnamon
The How-to
1 - Peel, chop, and core the apple
2 - Combine everything in a glass, microwave-safe bowl
3 - Microwave for 5 minutes, stir, and repeat til liquid's absorbed (about 10 minutes for the first 2 apples)
If you like it chunky, you're done! If you'd prefer smooth:
4 - Blend in a food processor until your preferred consistency
Uses?
I usually bake with applesauce replacing half the fats/oils in the recipe. Today I'm baking Apple-Raisin muffins. Of course, applesauce is a healthy snack too: one cup of homemade applesauce counts as a one-cup serving of fruit!
Your turn!
Try microwave applesauce, adjusted as needed (I've found applesauce in general to be very picky about humidity), and share what you think.
OR, share your favorite uses of applesauce: links to your blog posts or photos are welcome!
Thanks to some talented and creative chefs, my husband's desire for great taste and mine for simple prep & clean-up don't have to clash when we go to our cookbooks. Check out our "top 5" and share your own recommendations.

Our Cooking Story
My husband loves to cook: he grows herbs and knows the difference between various seasonings and spices; he scours Allrecipes.com, Recipezaar, and subscribes to Taste of Home in his reader. Whatever it is, he's willing to cook it so long as it produces delicious results.
As for me, I stick to baking, which I find relaxing; homemade rice-a-roni-like mixes, which are ready in just minutes; and recipes which call for dumping a few ingredients in the crockpot and eating it several hours later.
Here are the only 5 cookbooks we have; our "must-haves" when it comes to simple ingredients, simple prep, and even simple clean-up! Though we have delicious cookbooks, we reference these paper copies constantly and highly recommend at least the first 4 on the list for every simple chef (don't worry, the resulting dishes & flavors are anything but simple). Share your favorite cookbooks in the comments.
Note: Unlike some lists I write, these ARE ranked in order of how useful they are / how often I reference them. My husband would rank # 5 as # 1, but I don't consider it truly simple or worth buying unless you know (or are!) a serious chef.
1. Artisan Bread in Five Minutes a Day - I could write a whole post on this one, but let me just say this: a) I love baking, b) I even love kneading, but c) I don't have a lot of time for doing so. Enter Artisan Bread in 5, flour, yeast, water, and salt, and I get to give my husband the french, wheat, and even flatbreads he misses from back home without having to wash anything but a glass measuring cup, a plastic bowl, and a spoon. And it really does take just minutes. Simple.
2. The Ultimate Rice Cooker Cookbook - As the book's subtitle says, it's not just white, brown, and wild rices; pilafs, risottos, polenta, chilis, soups, porridges, puddings, and more all come from simple recipes in this great buy. Of course, you'll need a rice cooker for this one, but if you use it for this book's recipes plus those you can find online, a rice cooker's really a bargain home appliance.
3. Top Secret Recipes books - We have the out-of-print "Classics," but I hear the others are just as good. Often called "copycat" recipes, we're often looking these up online: how do I make french fries like my favorite fast food chain? How about "The Soup Nazi"'s famous soups? Todd Wilbur, who authors the Top Secret Recipes books, puts out very complete collections of well-done imitation recipes, many of which allow us to make our favorites with 'normal' ingredients we can get here.
4. George Foreman Grill recipes - I haven't actually bought the cookbook, but the paper booklet that came with our grill has several tasty, simple, healthy recipes I cook again and again. We have the smaller grill, though with the popular removable plate grill currently $50 off on amazon (comes with a grill, griddle, waffle iron, sandwich maker, and baking plate), I'd sure like to upgrade!
5. On Cooking - Literally a textbook. 1440 pages. On sale for $80. It's linked if you're interested, but truly, this is the cookbook for the serious chef hobbyist. Nonetheless, my husband uses the book all the time, so I couldn't leave it out (plus, who's ever heard of a "top 4" list?). It is simple in its own way - diagrams and tutorials carefully explain how to use each cut of meat, herb, and piece of produce, so you won't be stuck with a "1 can of this, 2 packages of that" type recipe. If you want to understand the significance of each item you put in a dish and make recipes of your own, this may be your book. I have to admit to having read the baking chapter to get a better grasp on what goes on with the yeasts and leavenings and to troubleshoot some problems I had at our new high-altitude home. But let me repeat again... you'd better be serious about cooking for this one to be a good investment!
6, 7, 8, 9, 10? Your Turn!
What "simple" (in whatever way you define that word) cookbook do you reference all the time? Don't keep the secrets to yourself; let us know what we may be missing out on! Links to reviews of cookbooks on your blog are welcome as well. Just please, share!
Hungry as I walked home tonight, I resisted the temptation to pick up convenience (i.e., junk) food and decided to mix up something healthy that would give me the calcium, fruit, and whole grains that I hadn’t had all day... and satisfy my sweet tooth, too!
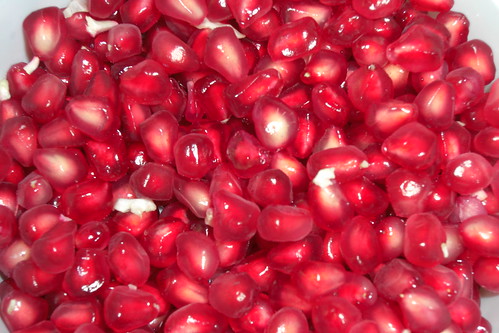 Pomegranate by Swami Stream on Flickr
• 80 ml (1/3 c.) rolled oats, toasted
• 40 ml (3 Tbsp) pomegranate seeds
• 75 ml (5 Tbsp) yogurt, plain
• 5 ml (1 tsp) honey
• opt. dried or fresh chopped fruit
Put it all in a small bowl. Stir. Eat! Makes enough for one not-too-hungry person (so you might want to double it, or more).
Download It
If you'd like to print a recipe page, I've uploaded a free printable PDF at Scribd. Enjoy!
...and you?
Try it out! What other grains or fruits (fresh or dry) would sub well in this one?
If you make this delicious snack, you’re welcome to add a photo to our flickr group!